Imaxel Editor – plugin for Woocommerce
How does our solution work?
How does the plugin work?
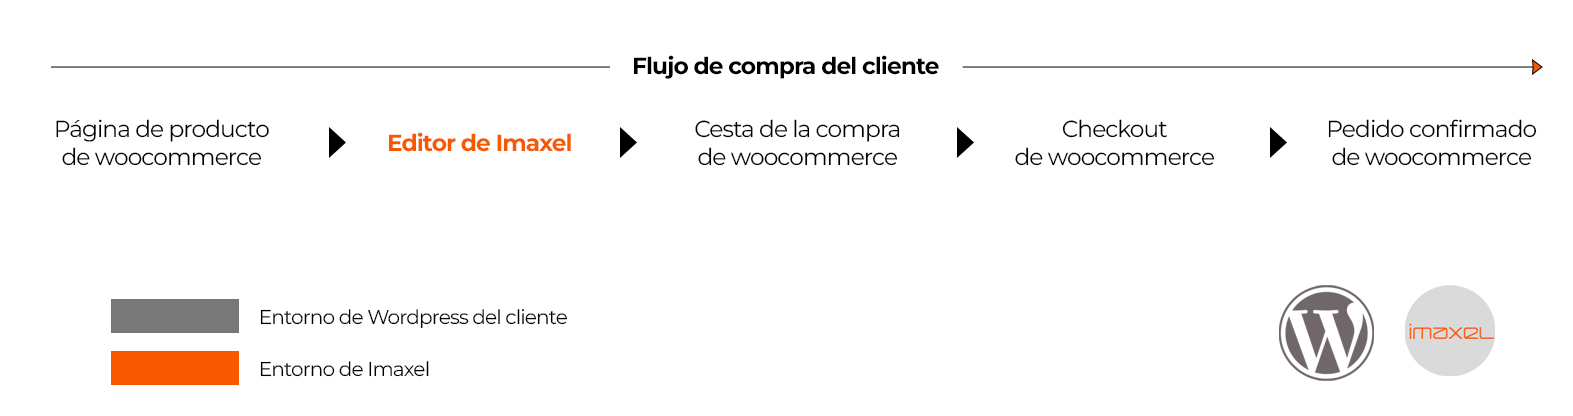
Our WooCommerce plugin allows product personalization by the consumer and integrates into the natural WooCommerce purchase flow, making the most of its features.
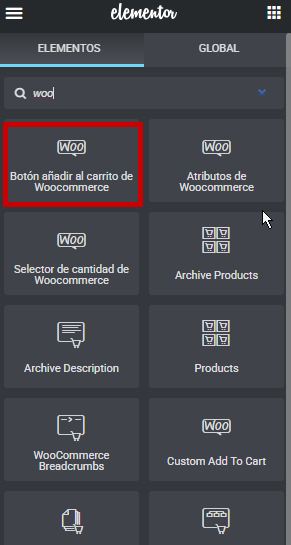
The plugin replaces the native WooCommerce Add to Cart button:
Once the consumer clicks the button, they access the product personalization, which the merchant has previously configured according to their needs:
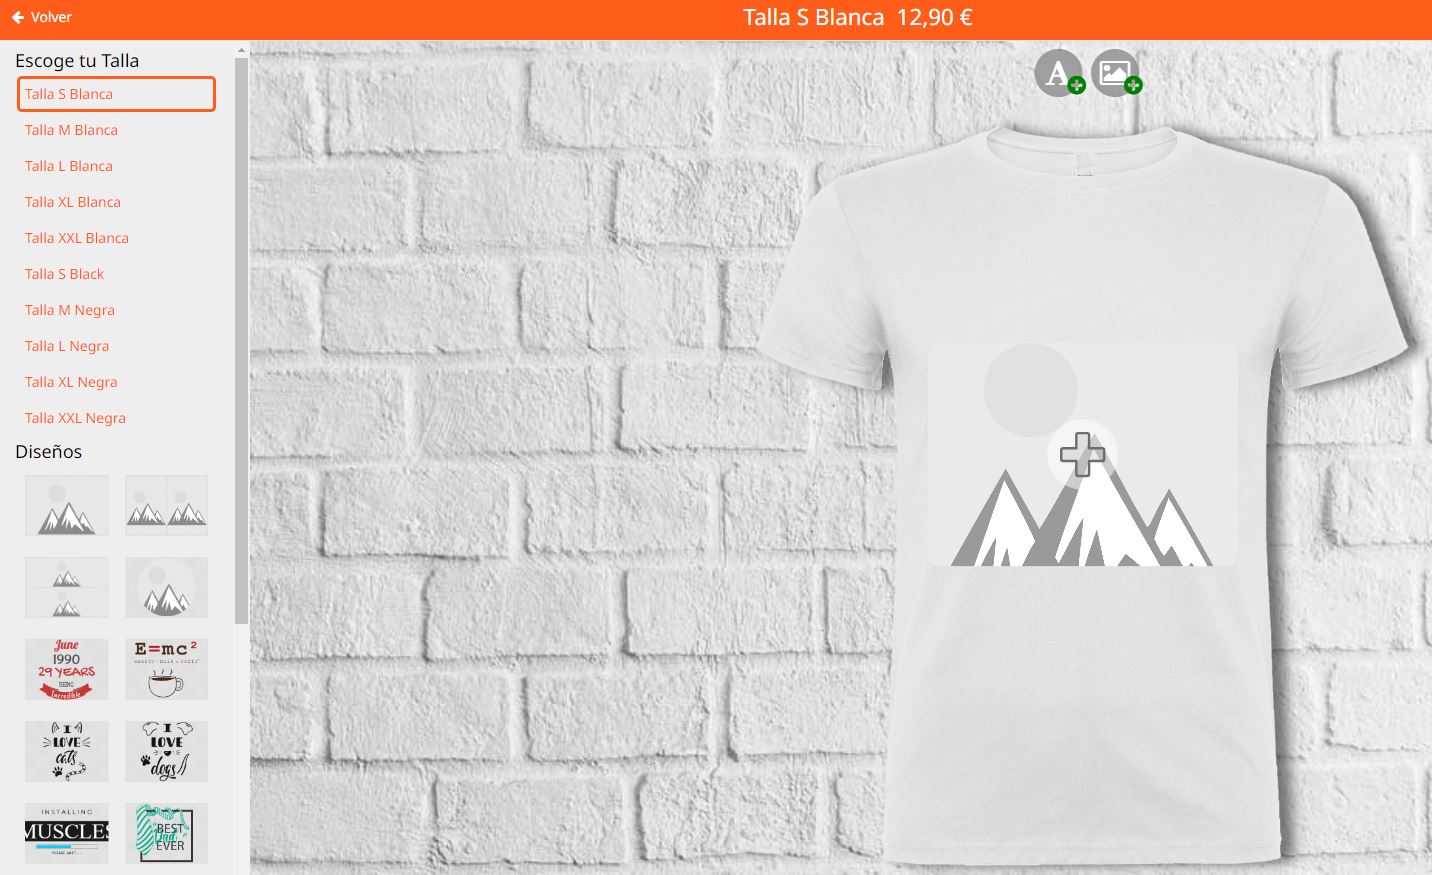
On the same editing screen, the consumer personalizes their product and, once finished, has two options:

- Save
This button stores the design created by the customer.- If the customer has previously registered and is logged into WooCommerce, the design will be linked in their My Account section.
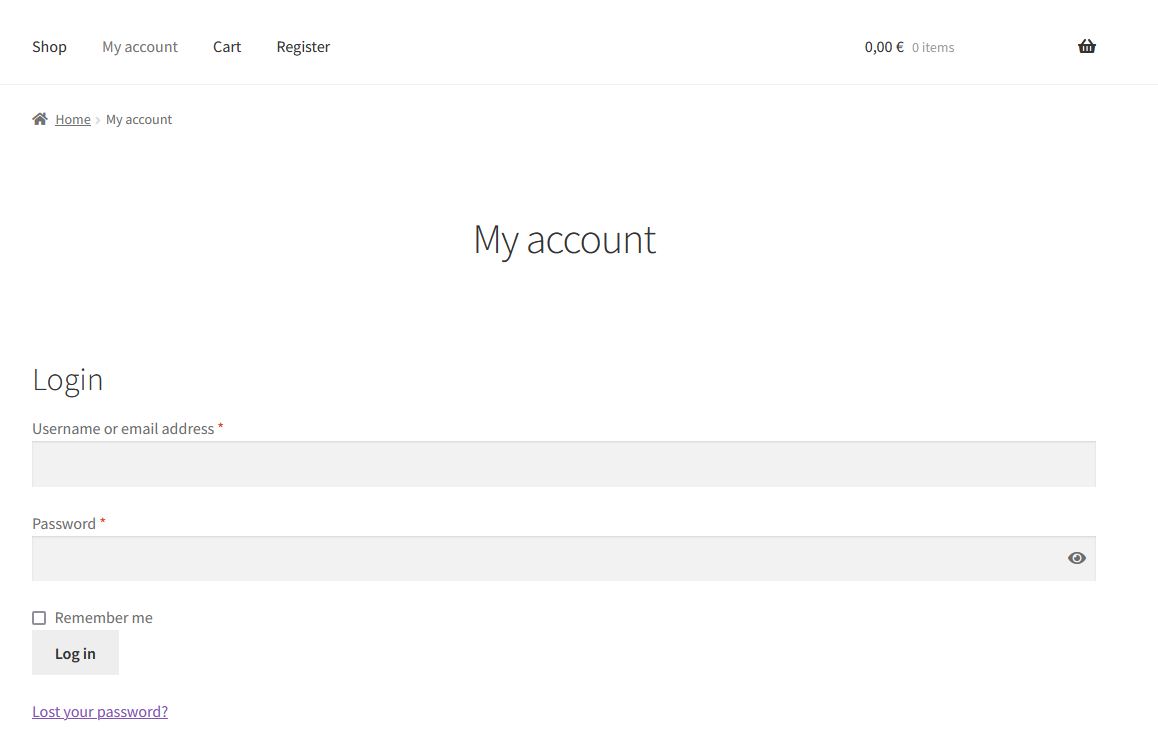
- If the customer is not logged in, the editor informs them that they must log in/register:
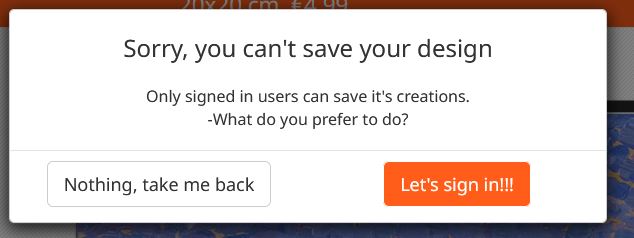
If desired, they will be directed to the WooCommerce registration page.
- Add to cart
This button returns the user to the WooCommerce shopping cart (and also saves a version of the design linked to the consumer’s My Account section if they are previously logged in).
Once in the shopping cart, the rest of the process follows the natural WooCommerce purchase flow.
Plugin Installation
Before proceeding with the installation, it is important to remember general recommendations for safely installing a new plugin in WordPress. Follow these key tips:
- Perform a full backup. Before making any changes, ensure you have a recent backup of your website (files and database).
- Check compatibility. Verify that the plugin is compatible with your version of WordPress and your server’s PHP version.
The Imaxel plugin is compatible with the latest versions of both WordPress and PHP. - Use a staging environment. If you have a production site, test the plugin first in a development or staging environment to avoid live conflicts or errors.
- Disable cache temporarily. Before installing, deactivate cache plugins to ensure changes reflect immediately and you can detect any issues.
To install the plugin, you must download it from the following link:
Download Imaxel Editors plugin for WooCommerce
And upload it to your site from the WP-Admin:

Once installed, the following will appear:

Plugin Configuration
The next step is to configure the plugin with the license key provided by Imaxel.
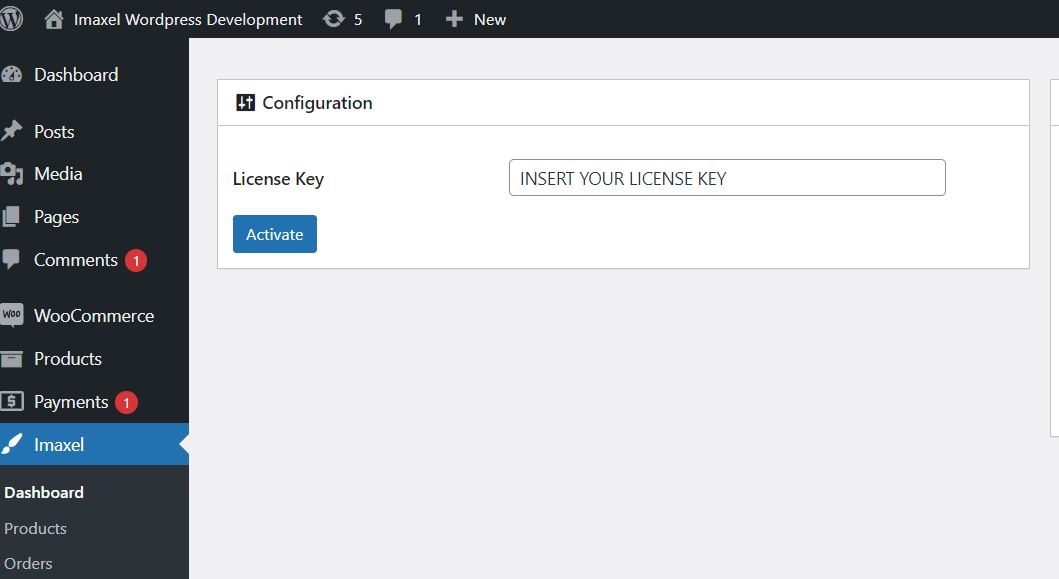
To do this, access the Imaxel-Dashboard section in the side menu and enter the license key.
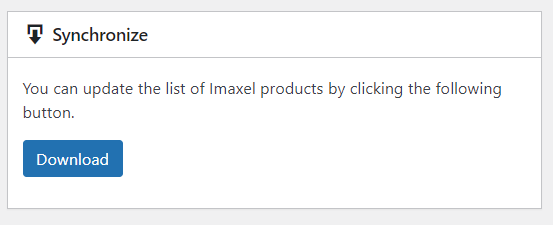
Next, we must import the product templates into the WooCommerce environment by clicking the following button:
Once done, you will be informed of the number of imported templates:

How are new templates created?
The installation comes with a list of default product templates, but you can create as many as you wish. For more information on what they are and how to create product templates, consult this article.
IMPORTANT! Every time we register new templates in our template manager, we must return to this section and update the list of product templates using this button. Only then will these new product templates be available in the plugin and linkable in WooCommerce.
Linking WooCommerce Products
The first step is to create the products in WooCommerce. This is a native WooCommerce process.
Next, we will link the desired product to the Imaxel product templates.
Access the product editor and go to the Product Data section, where you will see a new tab called Imaxel.
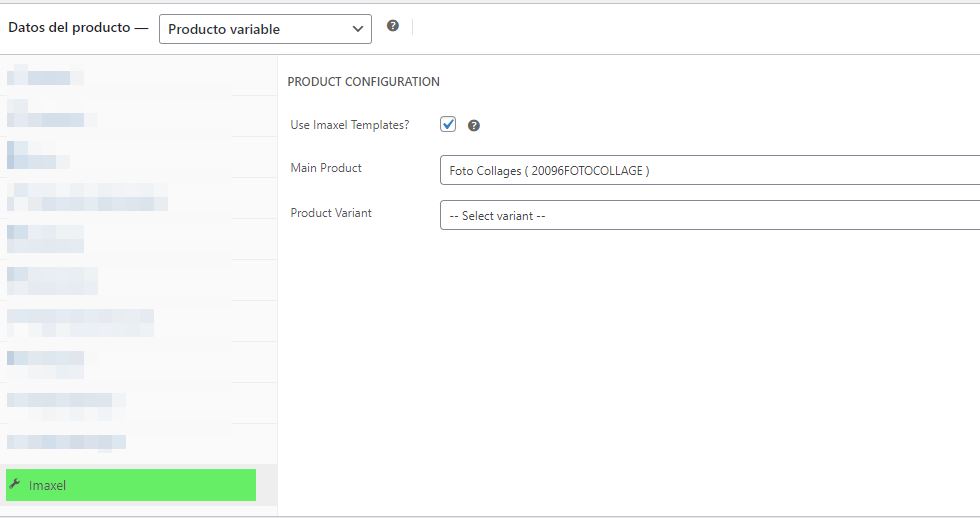
This tab has a checkbox that enables or disables the link between this WooCommerce product and an Imaxel product template:

Below that, there is a box to filter the desired template, or you can use the dropdown to find it.
The final step is simply to save the changes, and the product will be linked.
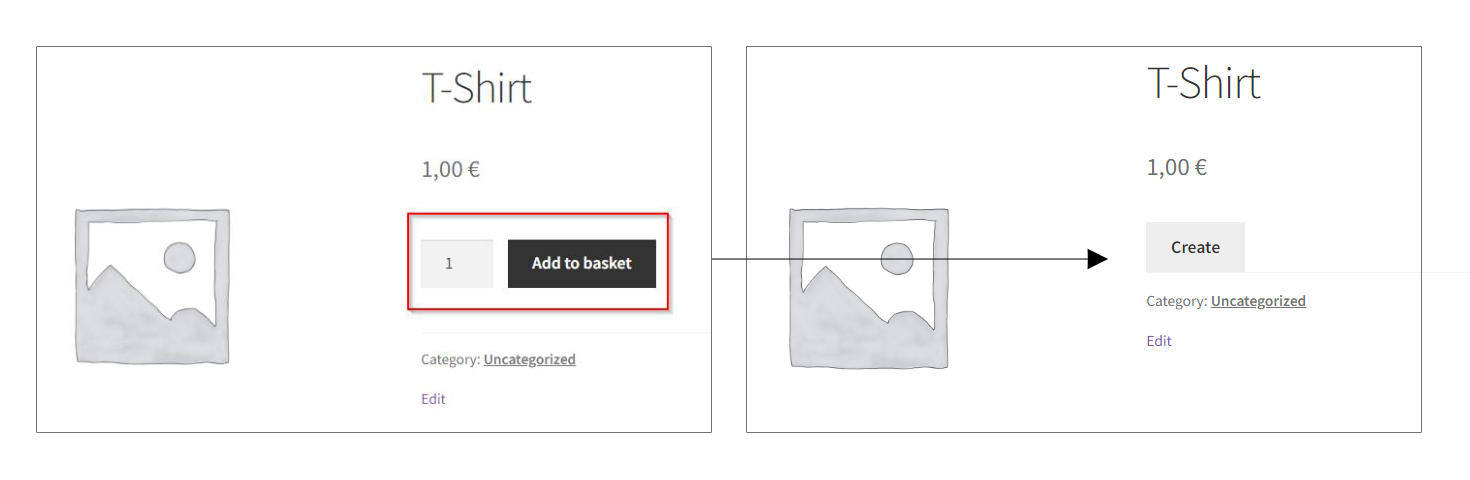
Once this is done, the “Add to cart” button will no longer appear on the front end of the WooCommerce product; instead, the “Create Now” button will appear, which links to our editor:

When the customer clicks the button, a call is launched to load the form with the previously defined steps, allowing the customer to personalize the product and send it to the cart to finalize their order.
For more information on price management between WooCommerce and the editor, consult this article.
Product Price
The product price must be registered in the Imaxel product Backoffice, and the plugin itself calculates the price in the customer’s order.
However, for this product to appear on our website with a price visible to the customer, we must assign a price to our product in WooCommerce; otherwise, it will show it as free by default.
How to create a product with variations
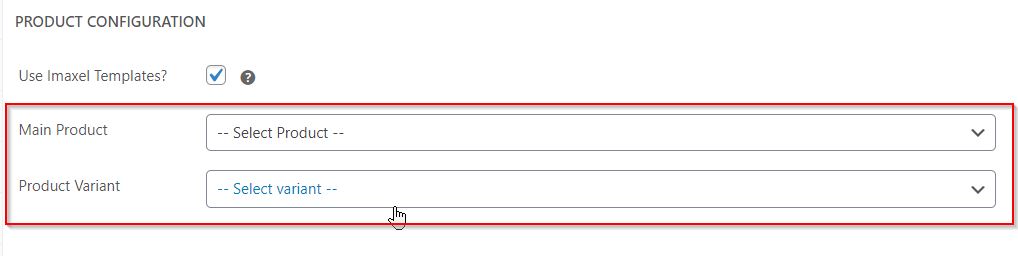
Imaxel product templates allow for different product variants. When creating a new product in WooCommerce, we can display these variants so that the customer selects one on the website, and at the time of editing, only the selected variant appears.

To create these variations in a WooCommerce product, the first step is to link this template with an Imaxel product template as seen previously, and then follow these steps:
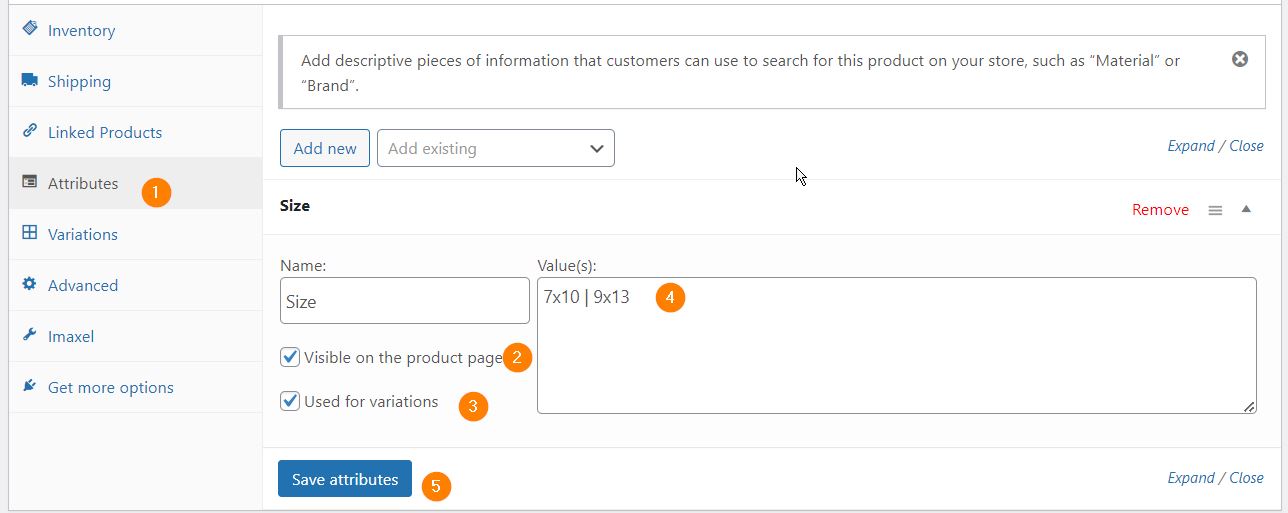
- Create Attributes
In the Attributes section of the product data, we will register an attribute, give it a name, and add the different attributes (these values must be separated with the “|” character). Mark the Used for variations checkbox and click Save attributes.
- Create Variations
In the Variations section of the product data, we will need to add a variation by selecting the option “Create variations from all attributes” and clicking Go.
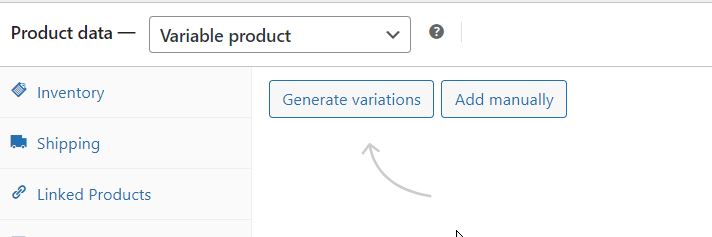
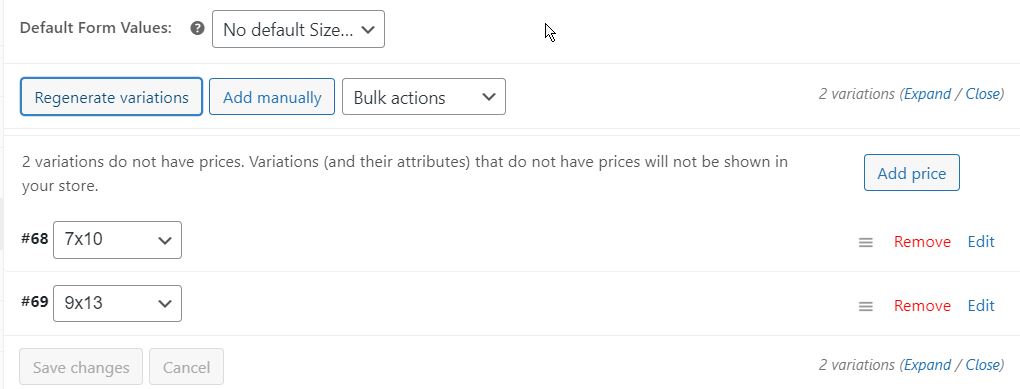
When creating the variations, it will show a message about the attribute variations to be generated; accept, and the created variations will appear.
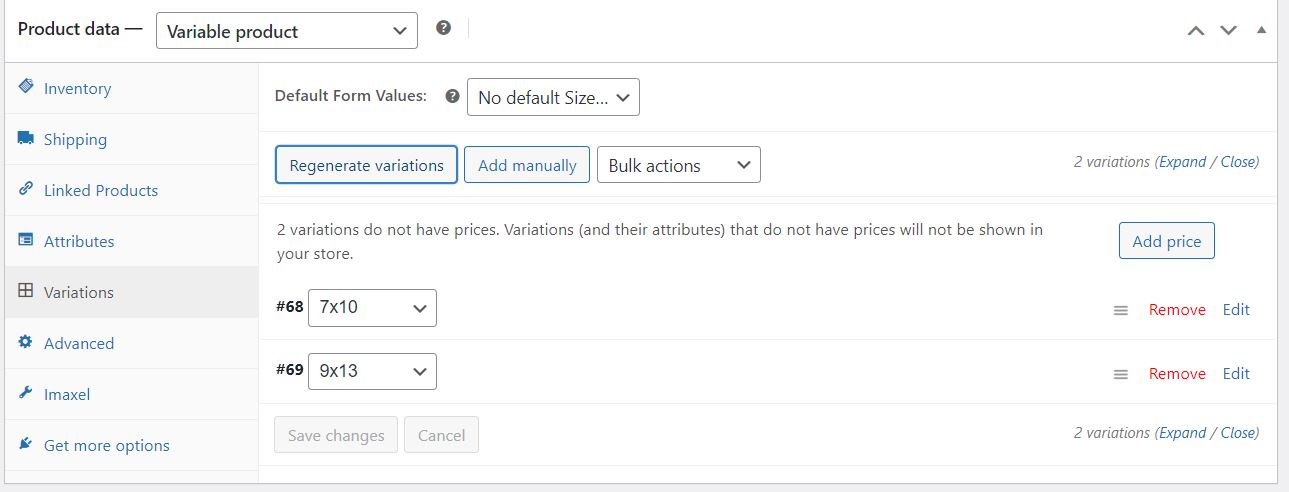
Once variations have been added, we will need to edit each of them to set a base price, link them to each variant of the template, and save the changes.
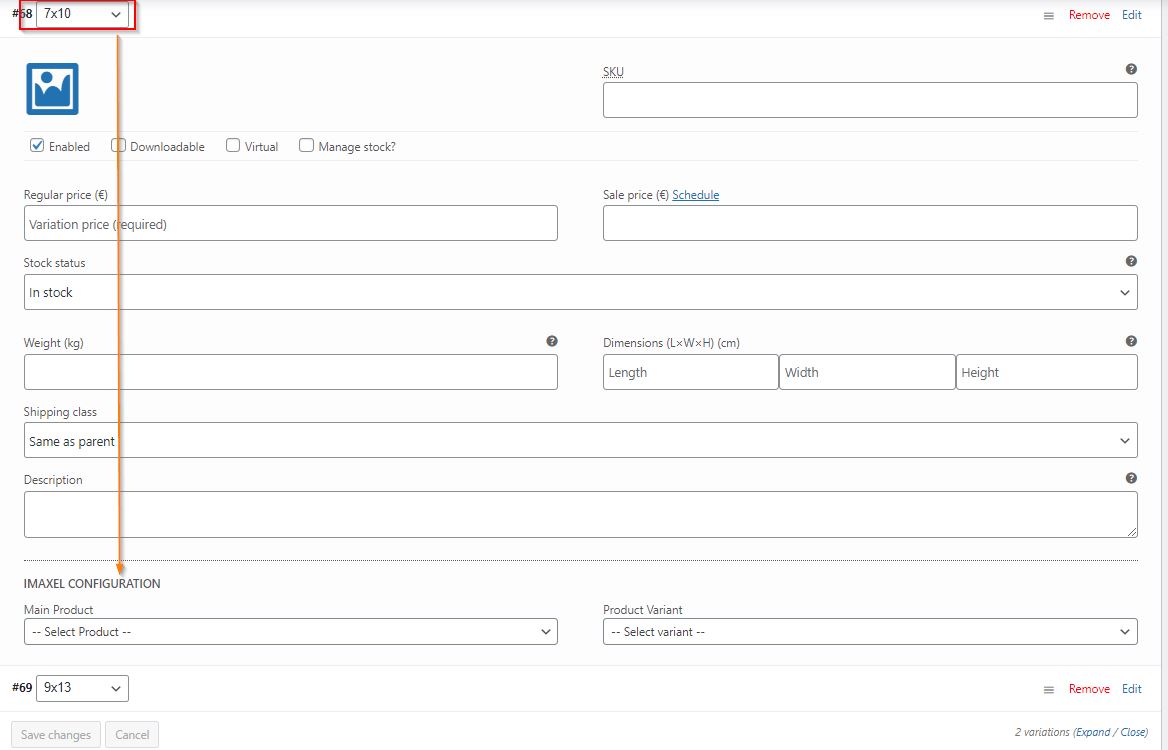

The final step is to Update the product so that all these changes are reflected on our Website.
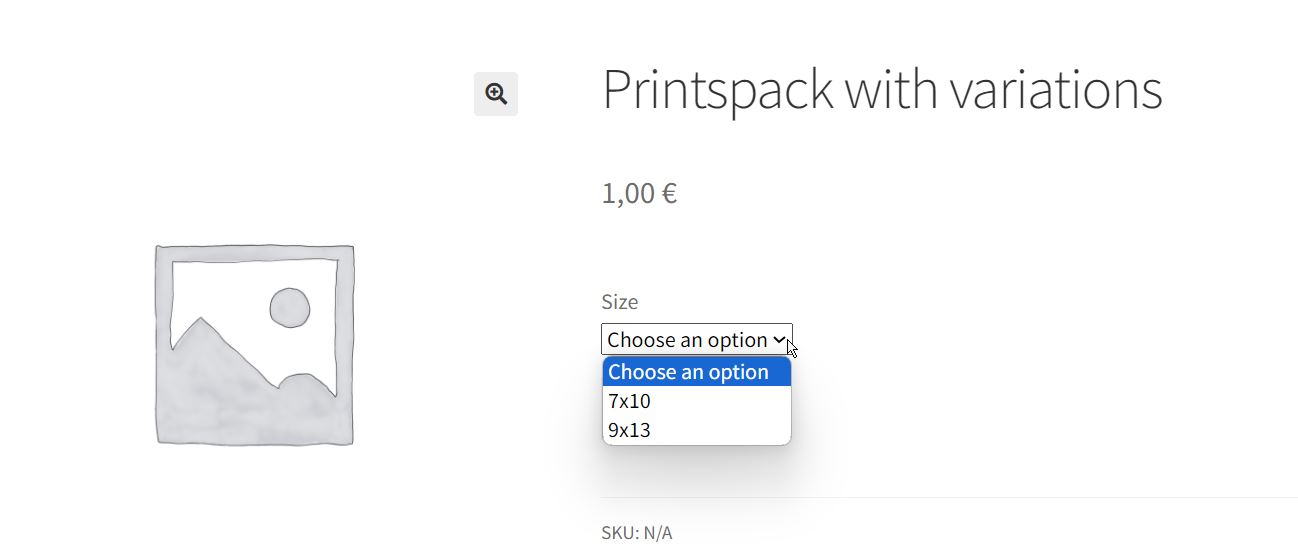
The WooCommerce variations will appear on the front end of the website, and each will link to the product template variation we have selected:
Options for the site administrator
In the WPadmin, we have the different plugin administration screens:
Dashboard
In this section, we highlight these areas:
License
Here we will enter the plugin license key (API key).

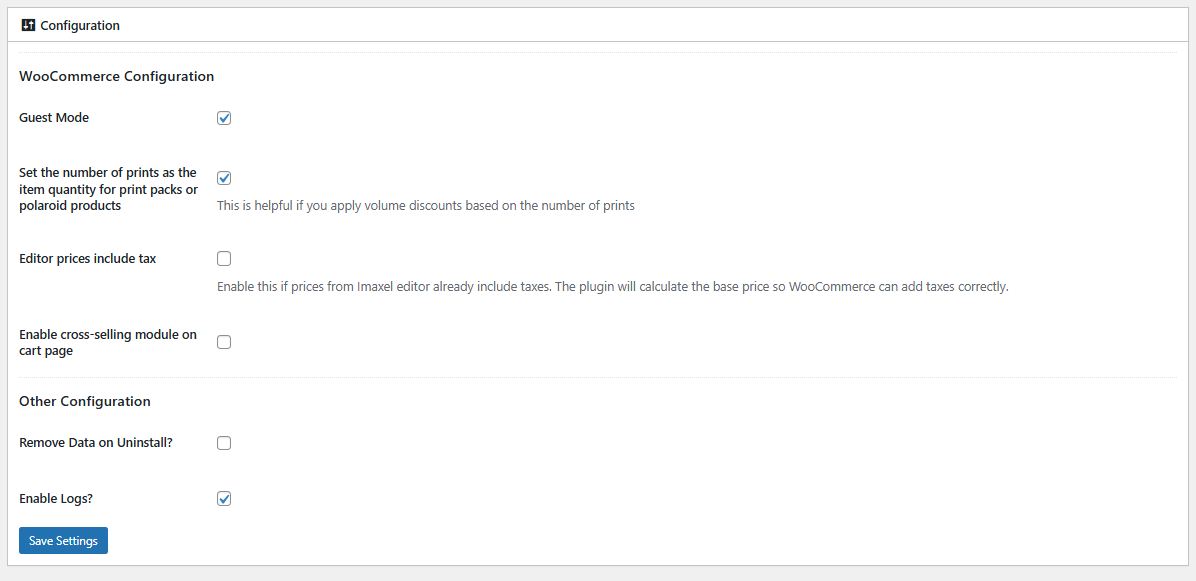
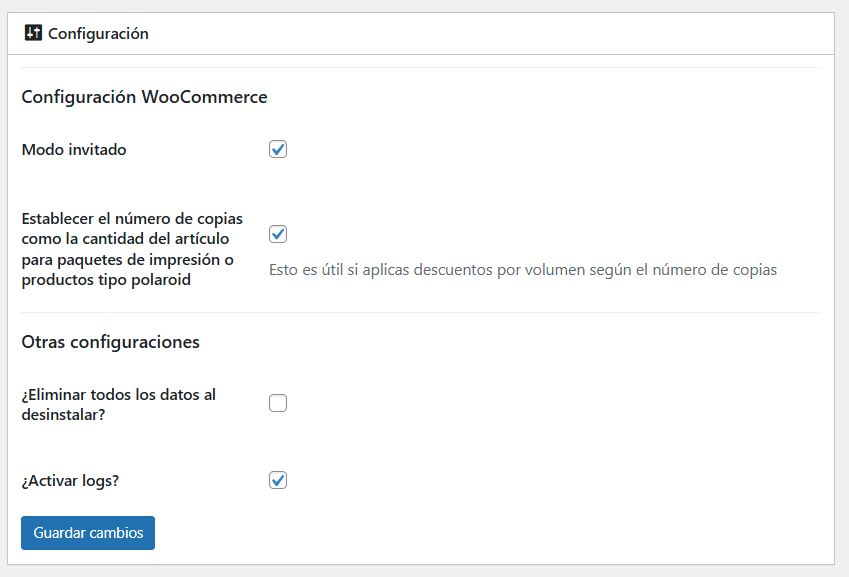
Settings
-
- Guest mode
Activating this option will allow users who do not have a previously created WooCommerce account to place orders. It is recommended to always keep this activated. - Set number of copies as item quantity for print packs or Polaroid-type products
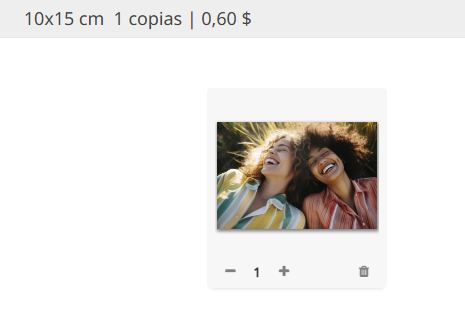
When we have a copy or Polaroid template, the total quantity of the cart line can be one unit (counting all copies as one) or showing the total number of requested copies in the cart. It is recommended to always keep this activated.
For example, with the checkbox activated: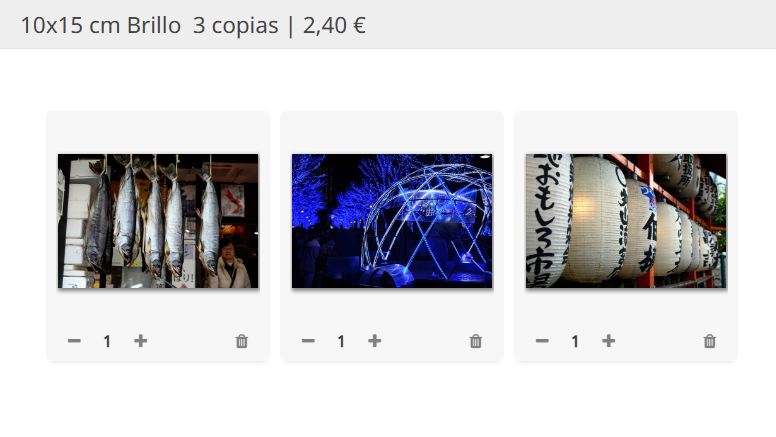
3 copies at 0.8 per unit 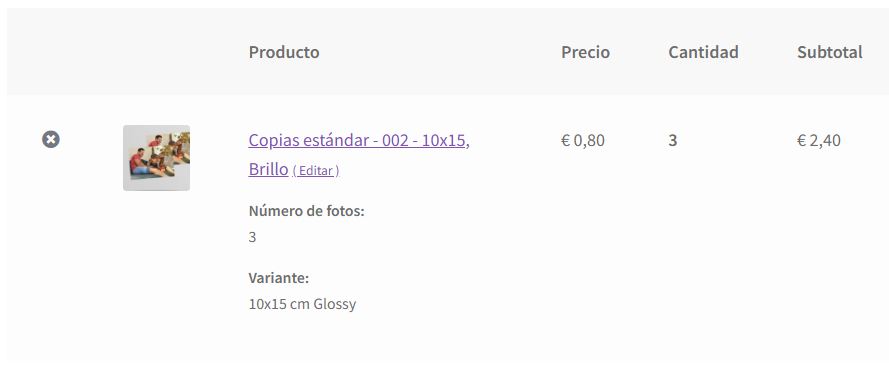
The detail is shown just as it appears in the editor
With the checkbox deactivated3 copies at 0.8 per unit 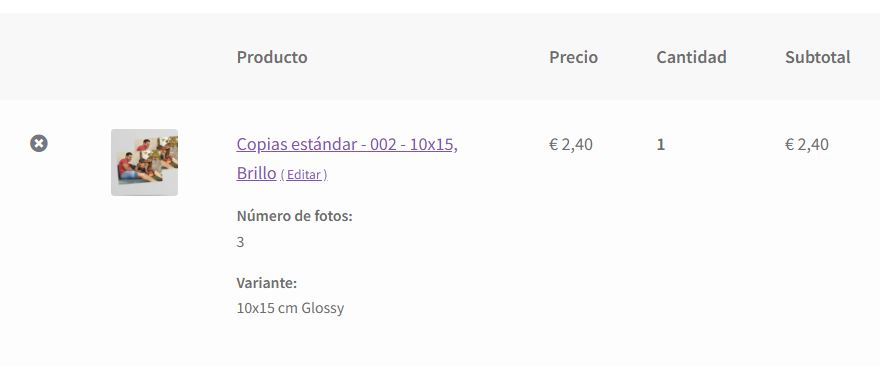
The detail is shown as a single product This option only applies to the Print Packs and Polaroid editors and in no case modifies the item price, only its visualization. - Editor prices include taxes.
Activate this option if Imaxel editor prices already include taxes. The plugin will calculate the base price so that WooCommerce can add the taxes correctly.Example: WooCommerce configured to apply a 21% tax on the base:
In the WooCommerce 1 – Settings 2 – Tax 3 – Tax Options 4 section
We will configure that we enter the price in the WooCommerce product sheet 5 without including taxes.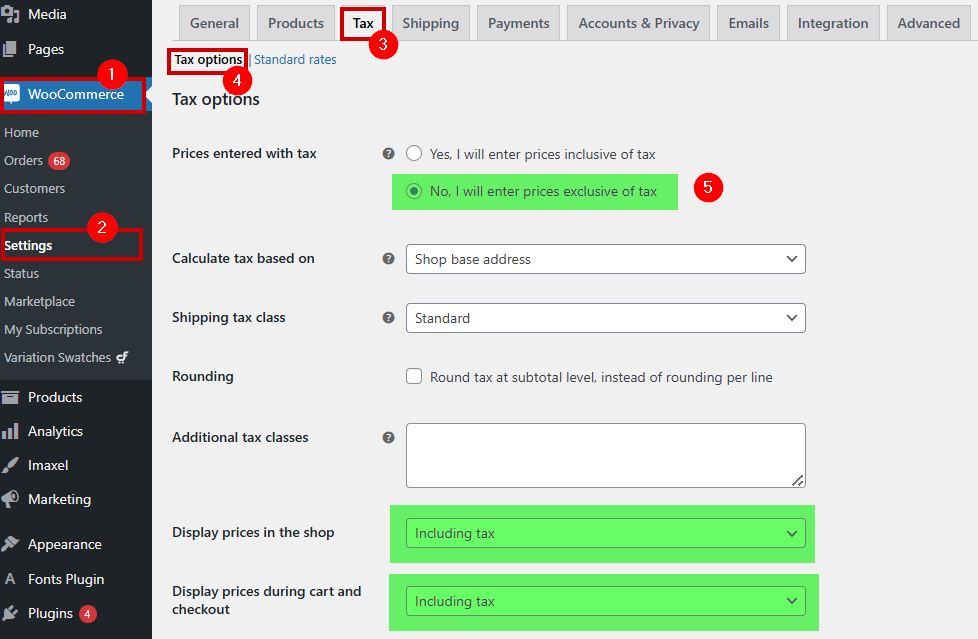
In the WooCommerce 1 – Settings 2 – Tax 3 – Standard Rates 4 section, we will configure the name (VAT) and the tax value (21%).
Thus, for a product whose price in the product sheet is €0.60 1 and we have marked that taxes should be applied 2 and the type 3 (previously defined):
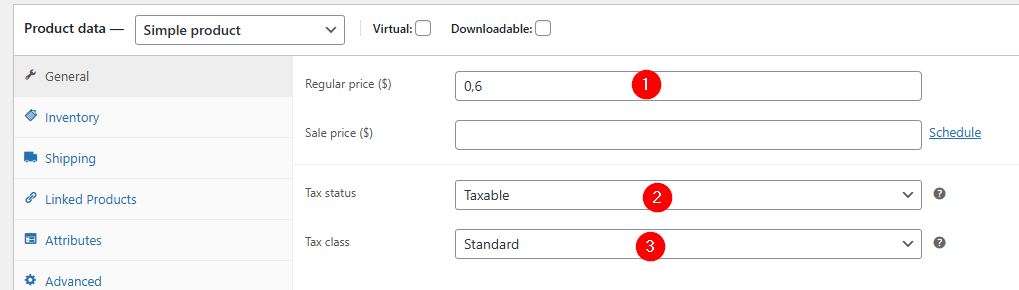
It will be visible in the product sheet with taxes applied:

When accessing the editor, we see the same price as in WooCommerce: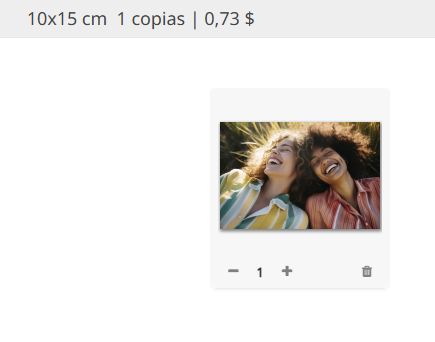
since in our template we have indicated the price including taxes: and after editing, it will appear the same in the shopping cart:

- Enable cross-selling module on the cart page
Enables or disables cross-selling, see details here. - Delete all data upon uninstalling?
Deletes all plugin data in case of reinstalls. - Enable logs?
Enables the creation of logs. A WordPress log is like your website’s “black box.” It is a text file where all errors, warnings, and technical notices occurring on your page are recorded chronologically. It is the most important tool for a developer or administrator when something goes wrong, and its sole and primary function is to diagnose and solve problems.Our recommendation for security and performance: keep this checkbox deactivated by default and only activate it when solving a specific problem.
- Guest mode
Sync
When we create a new template or template variant, it is imperative to press this button to sync templates from the Template Manager with those stored in WooCommerce.
Check and repair the database
If any anomaly is detected in the plugin’s operation, this functionality checks for correct behavior.
Cross-selling

You can download the latest version at the following link:
Download Imaxel Editors plugin for WooCommerce
From the WordPress Dashboard:
- Go to Plugins > Add New.
- Click the Upload Plugin button at the top.
- Select the imaxeleditors-for-woocommerce.zip file from your computer and press Install Now.
WordPress will detect that the plugin already exists and show you a version comparison. Click the blue button: “Replace current with uploaded”.
Best Practices:
- Backup: Always perform a full backup of your database before updating any plugin.
- Cache: If you don’t see the changes after updating, clear your WordPress and browser cache.
Once updated, in the Imaxel – Dashboard section, you will have this option available:

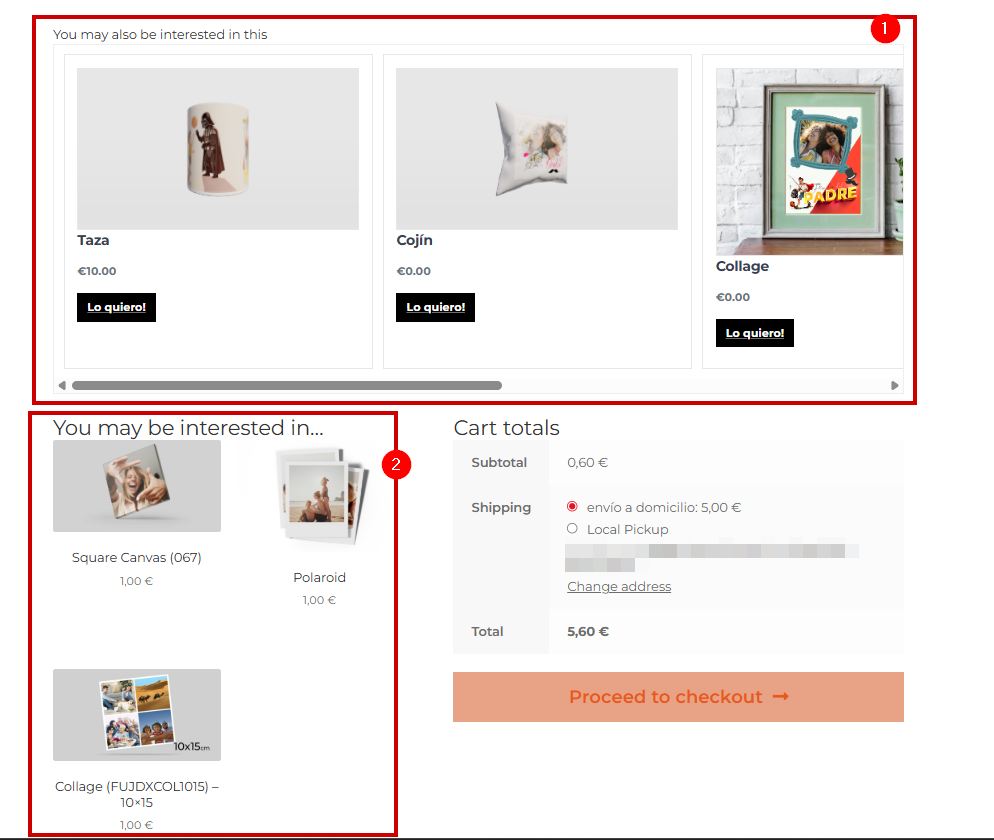
Once activated, when the customer personalizes an Imaxel product with their photos:
Suggestions for additional products, ready and edited with the photos used in the personalization, will appear in the shopping cart:
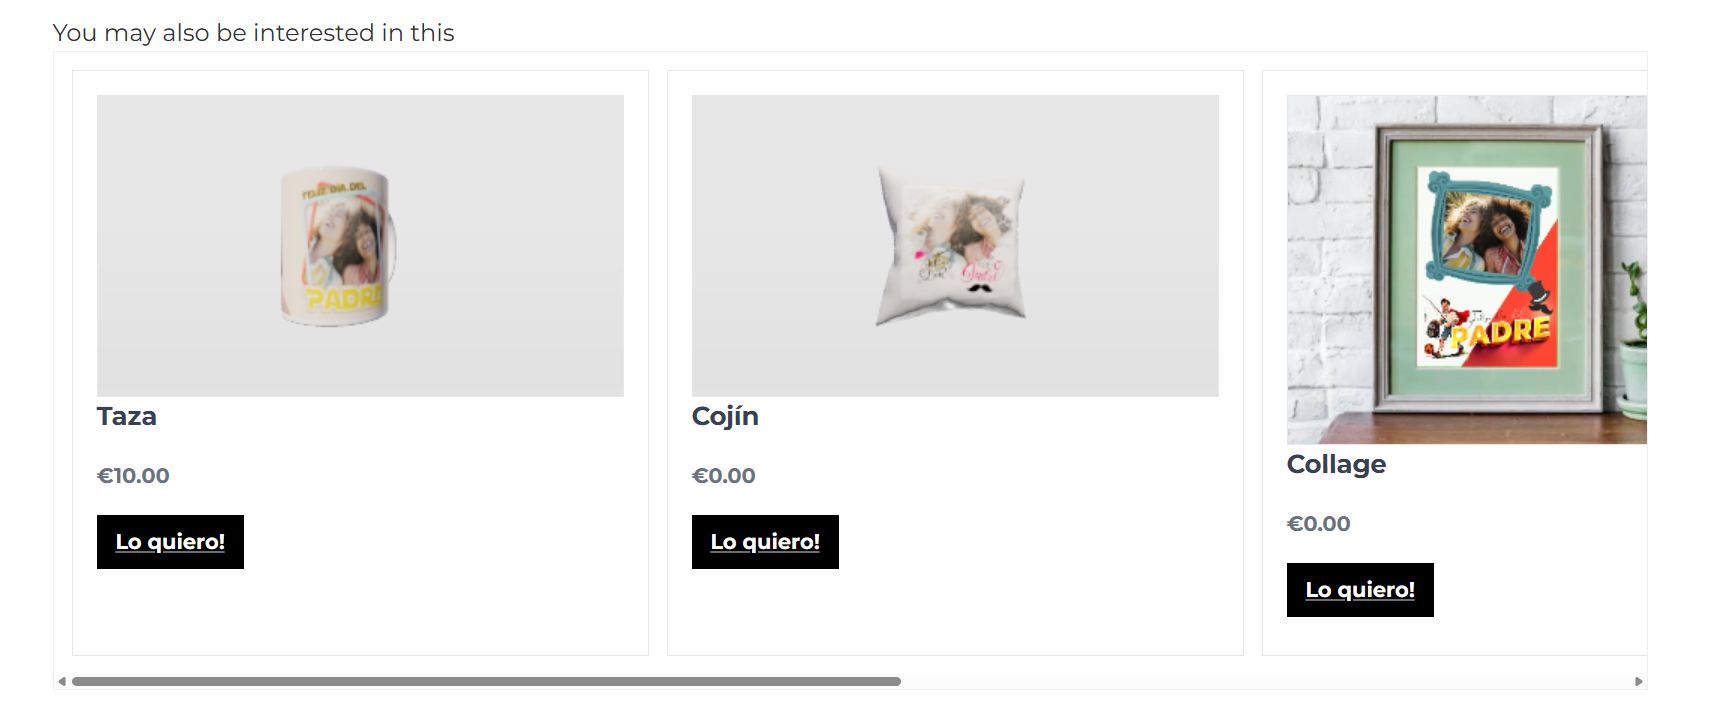
Our cross-selling can coexist seamlessly with native WooCommerce cross-selling, opening up the possibility of showing the customer a wider variety of products:
Available Cross-selling Options
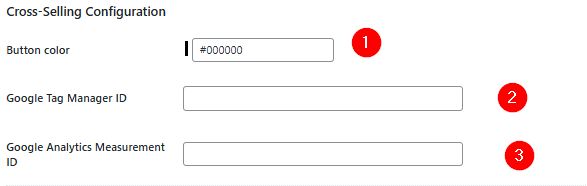
- Button color
The hexadecimal value (e.g., #FF5733) of the color you want the cross-selling buttons to display. - Google Tag Manager ID
The unique identifier (format GTM-XXXX) that connects your website with your Google Tag Manager control panel. It allows you to manage all your marketing and analytics tags from a single interface without touching the website’s code again. - Google Analytics Measurement ID
The unique identifier (format G-XXXXXX) that tells Google Analytics which specific property to send your site’s traffic data to. It is inserted into the code or Tag Manager to automatically measure visits, clicks, and conversions.
Imaxel 3D Product Placeholder
When this feature is activated, a product is created in the product list (not visible on the web) which is necessary for cross-selling to function.

Do not perform any action on this product, nor delete it.
Products
Section listing all templates and variants from the Template Manager.
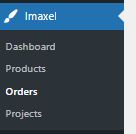
Orders
Section where all orders placed through the editor will be listed:

The following columns are presented:
- Order ID
The order number generated by WooCommerce. - Imaxel Order ID
The order number generated by Imaxel – only necessary for tracking in case of incidents. - Customer
Link to the WooCommerce customer profile. - Date
Order date. - Download
Link to download the order files, separated into order lines.This download will only be available if front-end download has been configured; this configuration is performed by Imaxel upon request based on your production flow.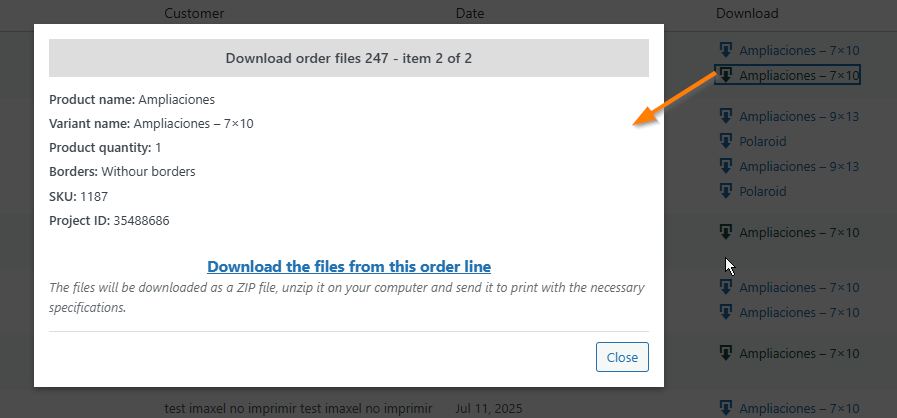
Download pop-up for files of one of the order lines. - Actions
There are two possibilities:- View
To consult WooCommerce order data. - Re-process order
In case you want to generate the order files again. This action is only available once and only if the original order files have already been downloaded.
- View
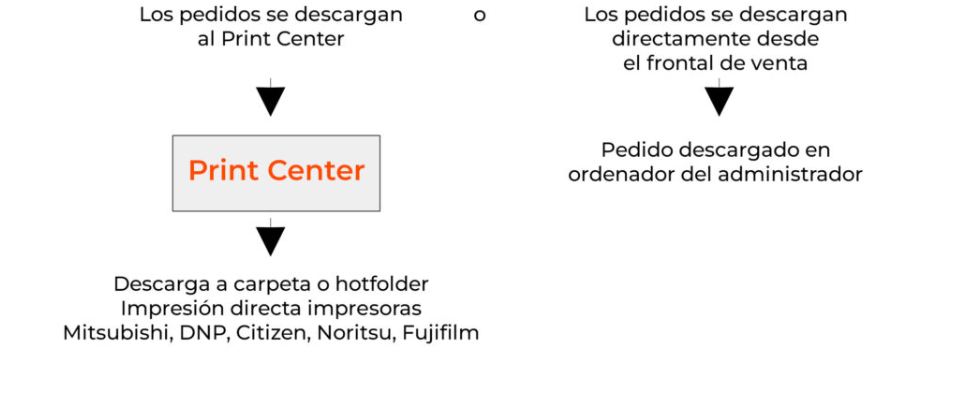
How does order file downloading work?
Recall that there are two options for downloading orders: through the plugin itself or via the Print Center.
If configured for download from the plugin (sales front-end), you must access the Imaxel – Orders section.
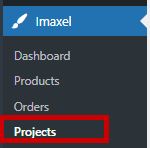
Projects
What is a project?
Every time a user, regardless of whether they are logged into WooCommerce or not, starts a design, a project is created.
The project contains the customer’s design information, such as their photos, the texts they have entered, the options they have selected—in short, the product personalization.

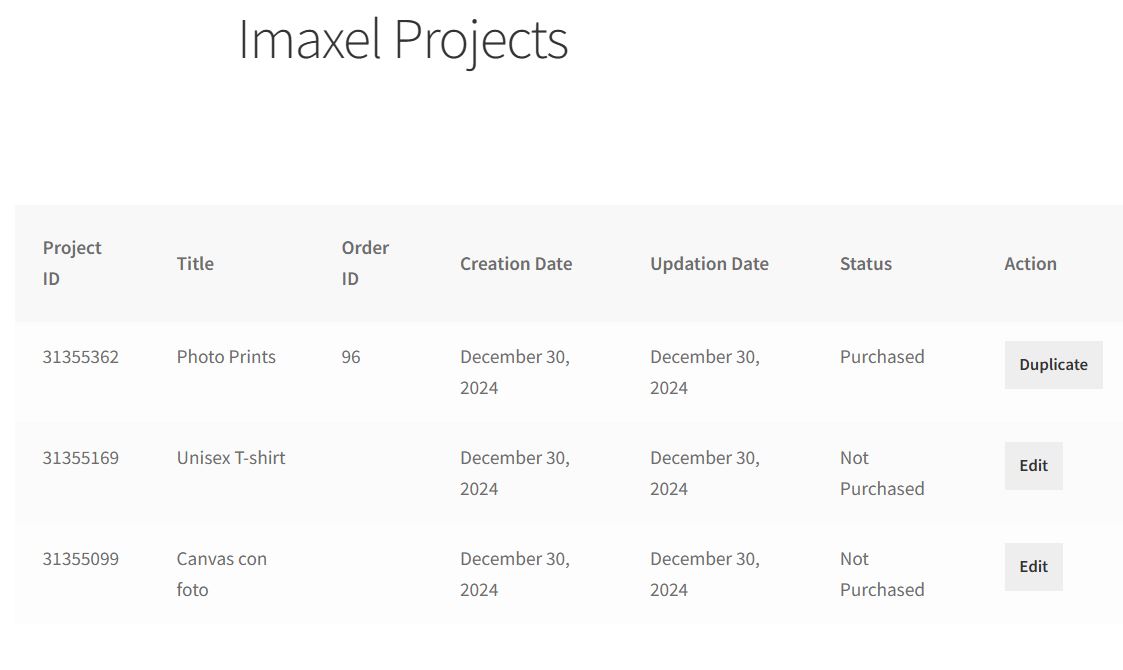
You can see all created projects and their owners in the Projects section along with a column 1 for possible actions:
- Edit
You can access project editing and modify it. Very useful for helping customers with questions before order confirmation. - Duplicate
Generates a copy of the project. - Process
Generates a new order based on the Project. This new order will be generated in both the Imaxel and WooCommerce environments. When a project is associated with an order, the WooCommerce order number is indicated in the Order Id column 2.
Both the Duplicate and Process actions preserve the project owner. The owner is detailed in the Owner column 3 , which can have three values:
- The field is empty
This means someone accessed the editor without being previously logged into WooCommerce; thus, the project has no assigned owner. - The store administrator’s email
When the administrator has duplicated a project that had no assigned owner. - The customer’s email
This means someone accessed the editor while logged into WooCommerce; thus, we know which user is working on that project.
All projects have a unique number, listed in the Project column 4.
In the Status column 5 , you can see the project’s situation, which can have 3 values:
- Not purchased
The project is stored in the customer’s My Account area (if they are logged in, meaning there is an owner in the Owner column). - Purchased
The project has been converted into an order (the associated order number can be seen in the Order Id column 2). - In the shopping cart
The project is stored in the customer’s My Account area (if they are logged in) and is also currently in the shopping cart.
In the Date updated column 6, you will know when the project was last accessed and can calculate how much longer it will remain available.
How long is a project stored in Imaxel?
Regardless of the project’s status in the Imaxel Projects section, each design has an expiration time.
Standard print projects are stored for 15 days, and all others for 90 days.
This period resets every time the user accesses the project and saves a new version.
FAQ
-
How can the user access their saved designs?
Each time the user completes an order or saves a copy of their design, a project is created.
That is, each design is a project.
These projects contain the user’s design information and are accessible from a section in their Private Area called Imaxel Projects.On this screen, the user can check the status of their project, whether it is in the shopping cart (in Cart), stored (not purchased), or if a purchase has been completed (purchased):
Similarly, different actions can be performed on the project: in the case of an order, it can be duplicated to generate another new order, and if it is not purchased, it can be added to the shopping cart to be finalized.We store them for 90 days from the date of the last update/edit by the consumer for most products. For Prints products, we store them for 15 days after the last consumer update/edit.
-
How long are consumer projects saved?
Regardless of the project’s status in the Imaxel Projects section, each design has an expiration time.
Standard print projects are stored for 15 days, and all others for 90 days.
This period resets every time the user accesses the project and saves a new version.For example, if a user starts an Album project on January 1st. After 90 days, the project will be deleted, but if they access the project from the Imaxel Projects section of their user account, open it, and save a new version on day 89, the counter will reset and it will be available for another 90 days. -
What happens if a user wants to buy a project that is no longer available?
This action is not possible, and the plugin will prevent the completion of a purchase for a project that is not available, alerting the user accordingly; this way, we prevent the customer from buying something that is not accessible.

-
I updated the theme or a plugin and the editor stopped working.
WordPress plugins are written by a vast community of programmers. They work with minimum requirements and lack mechanisms to check compatibility with other plugins or themes, so it is important to stick to the minimum requirements.
-
I installed the plugin and it’s not working.
Our plugin is tested on a basic WordPress/WooCommerce installation. It is likely that some plugin is conflicting with it; we recommend performing the installation in a test environment to deactivate plugins and detect where the conflict lies.
-
I installed the plugin, it seemingly works but I don’t see the CREATE NOW button.
The plugin replaces the native WooCommerce button with the editor access button; this is the way to ensure maximum compatibility with standard installations. If you are using a page builder like Elementor or WP Bakery and have edited the product page, make sure the mentioned button is present:
-
Which versions is it compatible with?
It is built to be compatible with the latest versions of WordPress and WooCommerce, and we maintain an active development line to keep it that way.
-
Is there any branding or added logo?
No, the plugin integrates into the website and is a white-label component (no branding).
-
How is it made?
The plugin is written using default WordPress language functions, ensuring maximum compatibility.
-
Does it integrate with Local Pickup Plus?
Local Pickup Plus is another plugin that allows the creation of physical points of sale in WooCommerce, giving the consumer the option to pick up their order at a physical store. Our plugin is compatible, adding the pickup point information to the order summary.
-
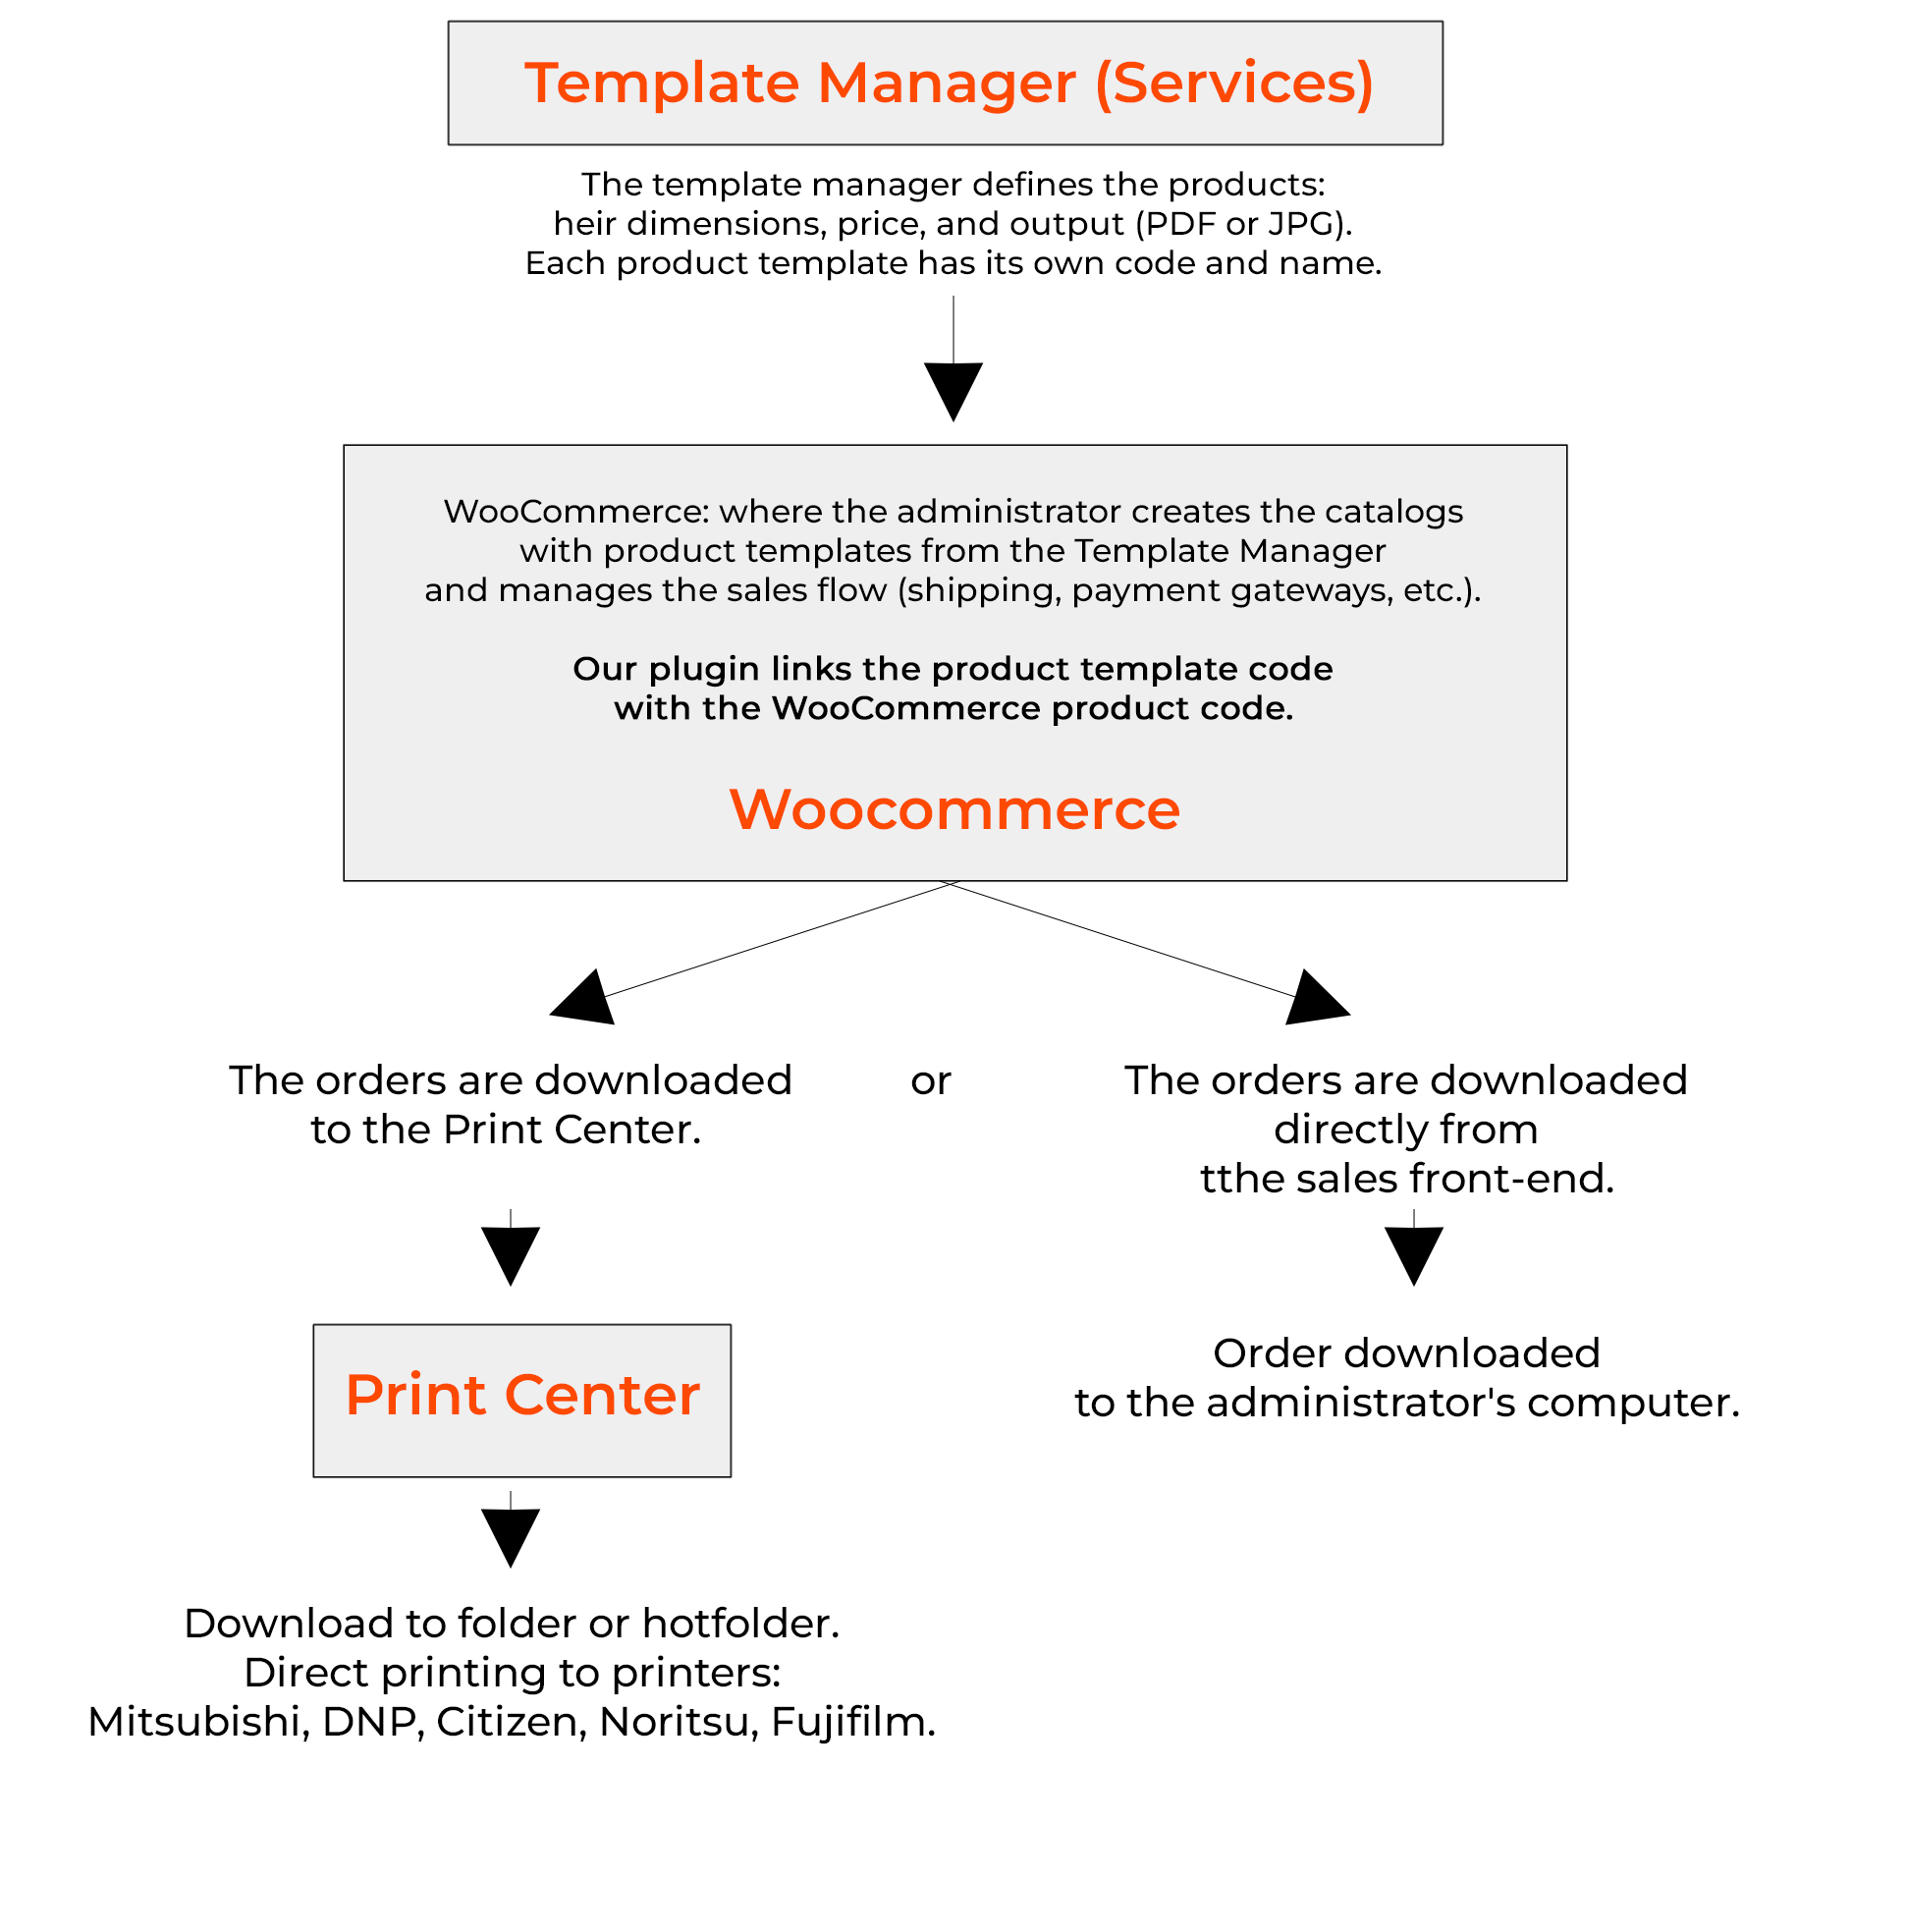
Who collects payment for the order? Does the plugin intervene in order shipping?
Payment management rests entirely with WooCommerce, as does shipping management; our plugin does not intervene. Here is a diagram illustrating what the plugin manages and what WooCommerce manages:
-
Where are users’ photos hosted? Is there a space limit?
Imaxel hosts its platform on AWS (the world’s largest) in different regions to provide the best service. All images are uploaded and stored on this server. It is not necessary for the merchant’s web to be powerful because image traffic and orders are managed by Imaxel.
-
Who sets product prices?
The merchant; our plugin does not set or modify prices.