Automatic FUJI Printing – C8
The C8 Plugin for Fuji printers is one of our plugins with the purpose of automating printing. Each plugin works for the automation of its respective printers: Noritsu, Fuji C8, Fuji PUD, Citizen, DNP, EPSON, Mitsubishi, etc. In this tutorial, we will cover the necessary steps to configure the plugin for Fuji printers with the C8 printing software.
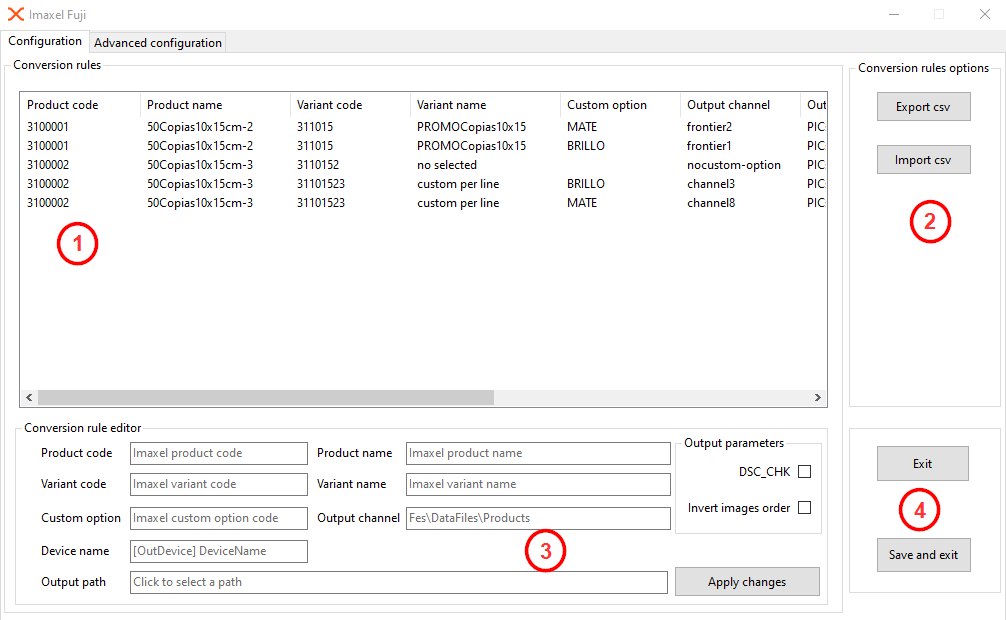
The first of the two screens that make up the plugin is the Configuration screen. At a glance, we can see the area dedicated to printing rules (1), to its right, the options for exporting and importing these rules via a CSV file (2), at the bottom, the configuration fields for each printing rule to add non-existent rules or modify existing ones (3), and finally, the Exit and Save and Exit buttons (4) to apply the changes made since the last save:
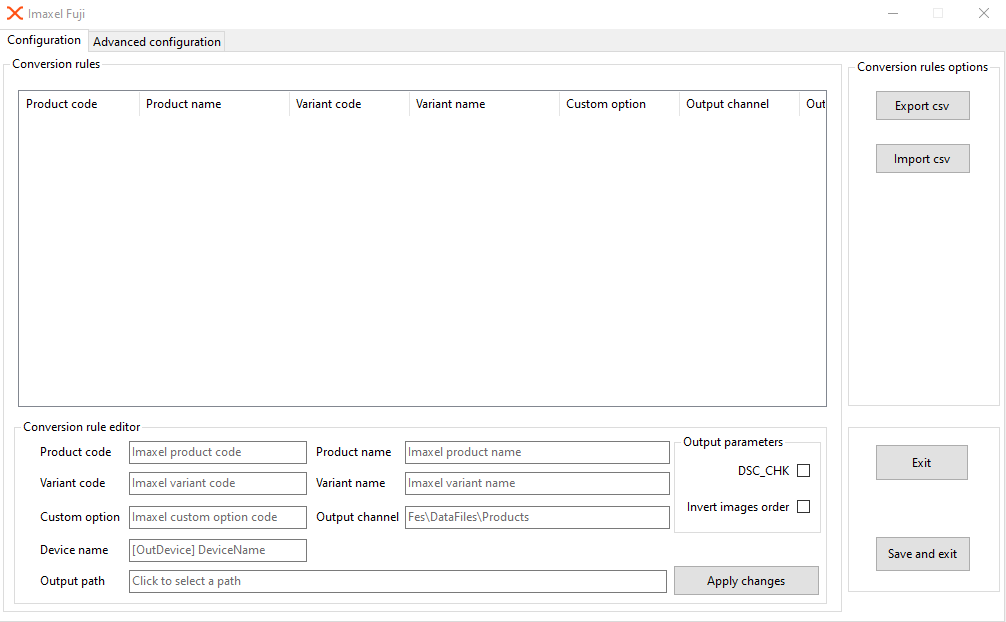
It is also important to note that if no rule is created in the plugin, it is normal for the horizontal scroll bar not to appear, as this is created when there is content to scroll through:
Existing Printing Rules
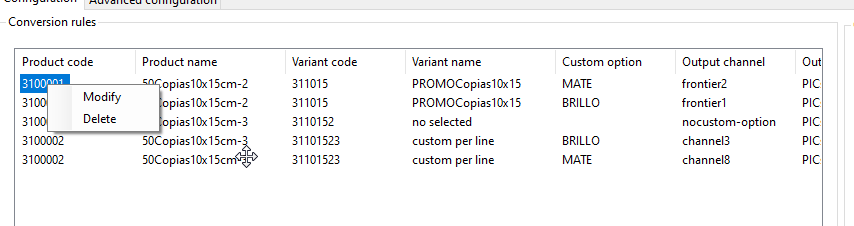
In the printing rules panel, you can see the rules that are already created and currently in operation. By right-clicking the mouse, you can either delete the rule with Delete or modify it using the Modify option. If you need to create several identical rules but with different custom options or variants, you can use the Modify option to avoid having to insert the same data repeatedly. The moment you press the Apply changes button and a critical component of the rule has been changed (such as the product code, variant code, etc.), the software interprets it as a new rule and creates it, always at the last position in the panel.
Printing Rule Editor
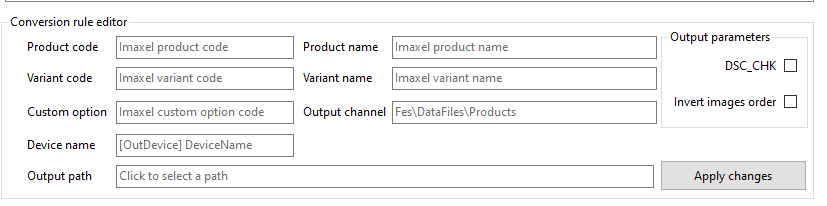
The following image shows the configuration fields of the printing rules; below, we explain each one in detail:
Product code
This is the product code from the Services template, available on the Services template editing screen, and it indicates the product that will follow the defined printing rule: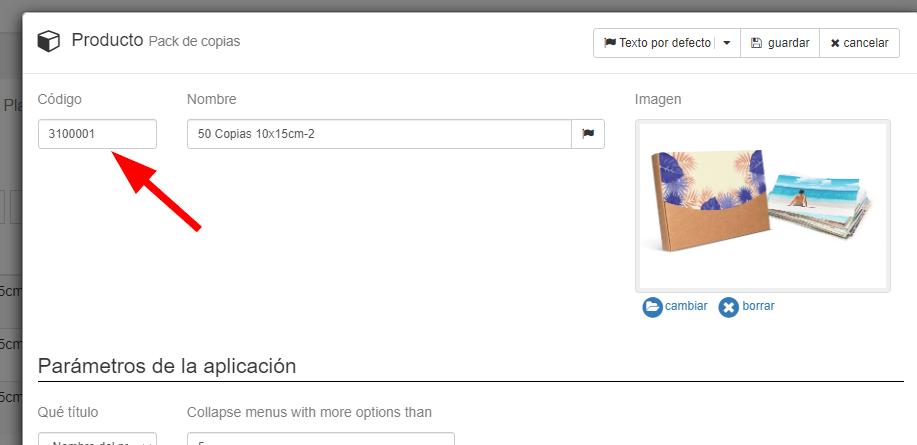
Product name
This is the product name from the Services template; it is only an informative field so that you can see at a glance in the printing rule which product the rule applies to (sometimes the product code, being numerical, may not be very descriptive).
Variant code
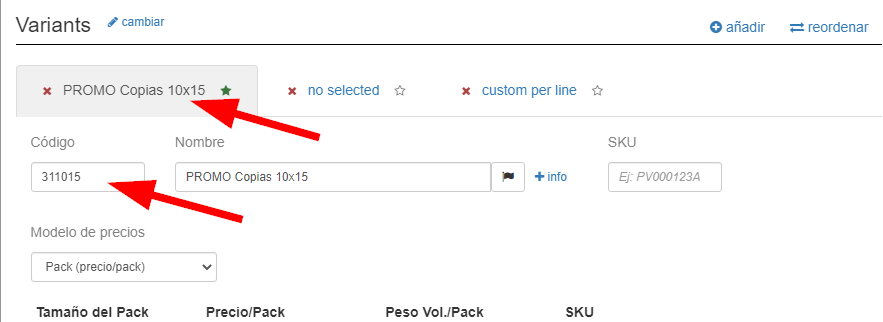
This is the variant code from the Services template, available on the Services template editing screen, and it indicates the product variant that will follow the defined printing rule:
Variant name
This is the variant name from the Services template; it is only an informative field so that you can see at a glance in the printing rule which product variant the rule applies to (sometimes the variant code, being numerical, may not be very descriptive).
Custom option
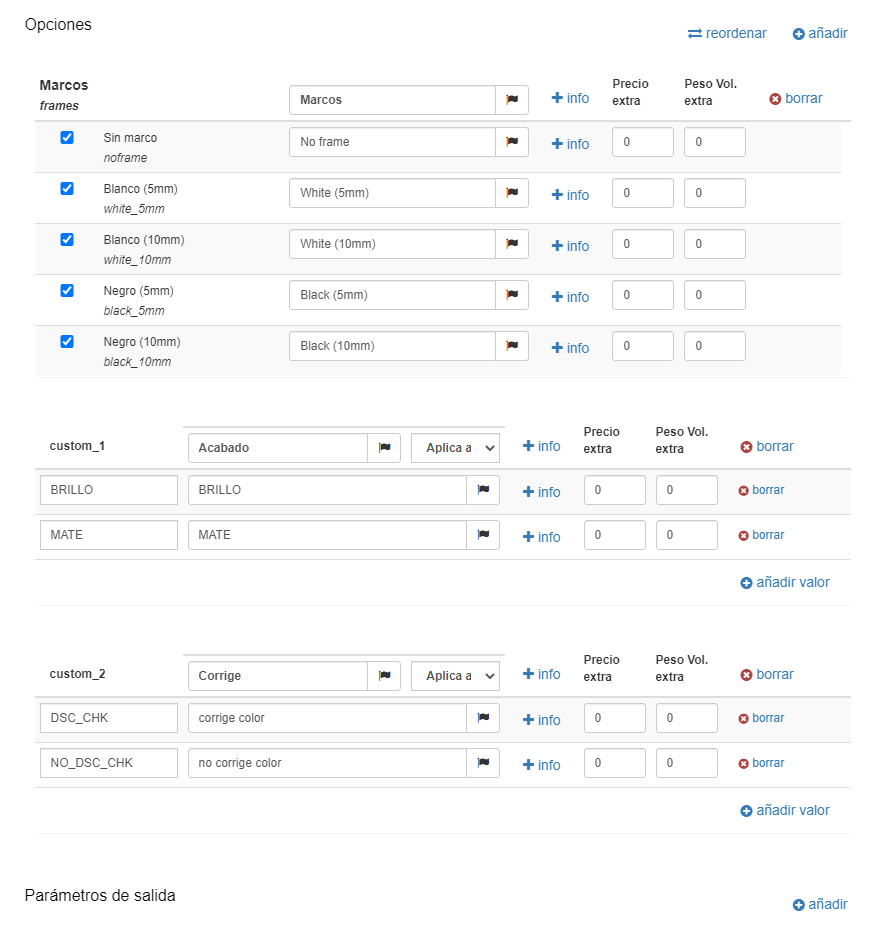
The custom option is the code of the custom option configured in the template variant (for more information on this parameter, click here), available on the Services template editing screen, and it indicates the custom option of the variant that will follow the defined printing rule:
 CAUTION! Although you can create multiple custom options for each variant in Services (N custom options), the plugin will only work with one custom option (two if we count the color correction one explained later). This is the case in version 2.1.7 of Production Center as of 06/13/2022.
This is because each custom option (for example, GLOSS, MATTE, etc.) can only go to one printer channel. Each printing rule can only be destined for a single channel.
Output channel
Refers to the C8 channel designated for printing, i.e., what the order’s destination will be according to the rule. For example, in the rule attached below, if the order contains a job that has the template with code 3100002, its variant is 31101523, and it has the custom option BRILLO (GLOSS), then that job will be sent to the channel3 channel for printing.
The plugin works in such a way that if a rule has a custom option designated, the combination of product code, variant code, and custom option code will be considered to determine the destination channel. Example: if the job contains a product with code 3100002, the variant used is 31101523, and the selected custom option code is BRILLO (GLOSS), the destination channel will be channel3.
However, if the rule does not have a custom option designated, only the product code and variant code will be considered to determine the destination channel. Example: all jobs containing a product with code 3100002 and using the variant 31101523 will go to channel4.
And finally, if a rule has neither a custom option nor a variant code specified, only the product code will be considered. Example: all jobs containing a product with code 3100002 will be destined for channel5.
Device name
Parameter to define the Frontier color space in the C8 software; options are PICsRGB or PICPD.
Output path
This will be the path where our plugin will leave the order files with their condition.txt in the correct format for C8 to read it and know what instructions to give the printer. This path should likely be a hot folder of the C8 software so that the printer ingests the images to be printed, as well as the file specifying all printing instructions (condition.txt mentioned above).
DSC_CHK
The DSC_CHK check will cause C8 to apply automatic color adjustment to the designated orders. By using this check in the plugin, you are not letting the user decide whether to apply auto-correction or not; you are configuring it in the plugin. That is, unless the user passes the DSC_CHK code from the editor, the plugin will follow the rule configured in this check.
Invert images order
By applying this check, the image generation of the order will be done in reverse, which is useful in some cases, such as album creation.
Printing Rule Importer/Exporter
When exporting the current printing rules with the Export csv button, a dialog box will open asking you where to store the resulting CSV file. This file will always be named imaxel_fuji_c8_products.csv, and if you select a path where a file with that name already exists, it will replace it.
The Import csv button performs the same option but opens a dialog box for you to select which CSV file should be imported (it will replace the current printing rules, whatever they may be).
Below you can see an attached example of a valid CSV file with all the columns and rows generated correctly (the content is an example, it is a sample to check the format).
Allowing the customer to select automatic color correction in the editor
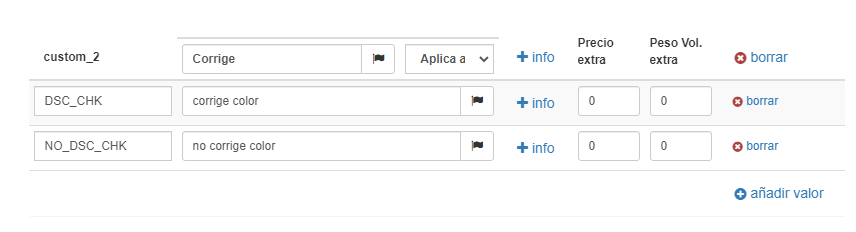
To do this, you just need to create a custom option in the template with two choices: the code DSC_CHK to indicate that if the option is selected, automatic color correction should be applied, and the code NO_DSC_CHK to indicate that if the option is selected, automatic color correction should NOT be applied.
Any desired text can be put in the description that appears in the editor; the identifying codes are what is important, as these are what the plugin analyzes automatically and programmatically (without user inputs). If the plugin detects that the job has a custom option with the code DSC_CHK, it marks it directly to send the automatic correction to be applied. However, it does not take into consideration when the customer selects the option with code NO_DSC_CHK.
Example of custom option defined in the template:
Example of custom option shown in the editor:
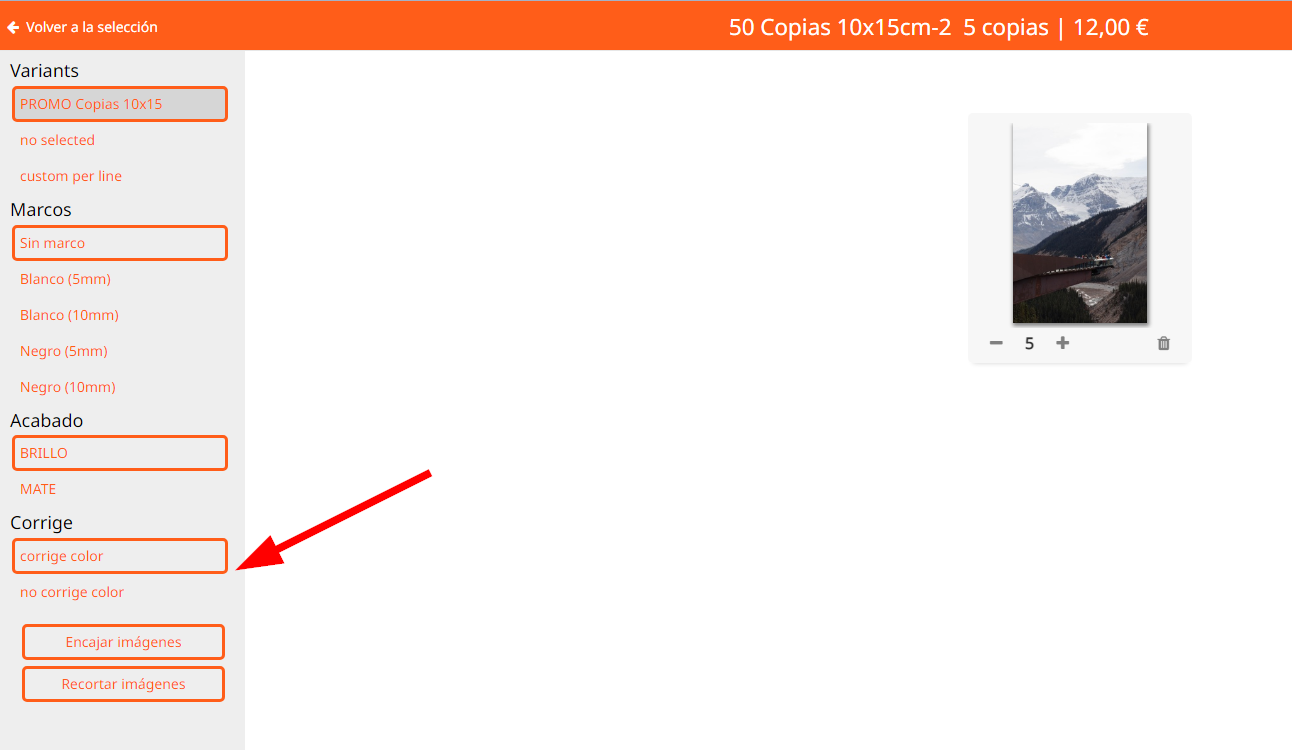
If I am the user and I select the option corrige color (correct color, code DSC_CHK), no matter what is configured in the plugin, the generated condition.txt file will have auto-correction set to TRUE so that it is applied. Conversely, if I select the option no corregir color (do not correct color, code NO_DSC_CHK), then the rule configured in the plugin is followed, because you might want to decide that, for example, all orders with the MATTE finish have color auto-correction.