How to use the PDF uploader of a combined product
In this tutorial we will show you how to configure PDF file uploading for your product. To do this, we will first need to have a product created. If you have any questions about how to do it, you can follow the steps in this other tutorial to the section Link the product with a template.
Remember that in the third tab you can define the number of steps that the sales flow of your product has. To get started, you just have to enter a name for the step and press the Add button:

Add new step function
With the new step already created, add the new function it will have: link to a template or upload a PDF file, if you want to know how to link a product to a template, check out our tutorial about it. Select Upload a PDF and press Add on the highlighted button:

Navigate to the new PDF upload tab, in it you can see that we have the option to define the title of the function (like when we link a template), as well as two PDF upload options. We will first inform you about the option Set up specific options:

Set up specific options
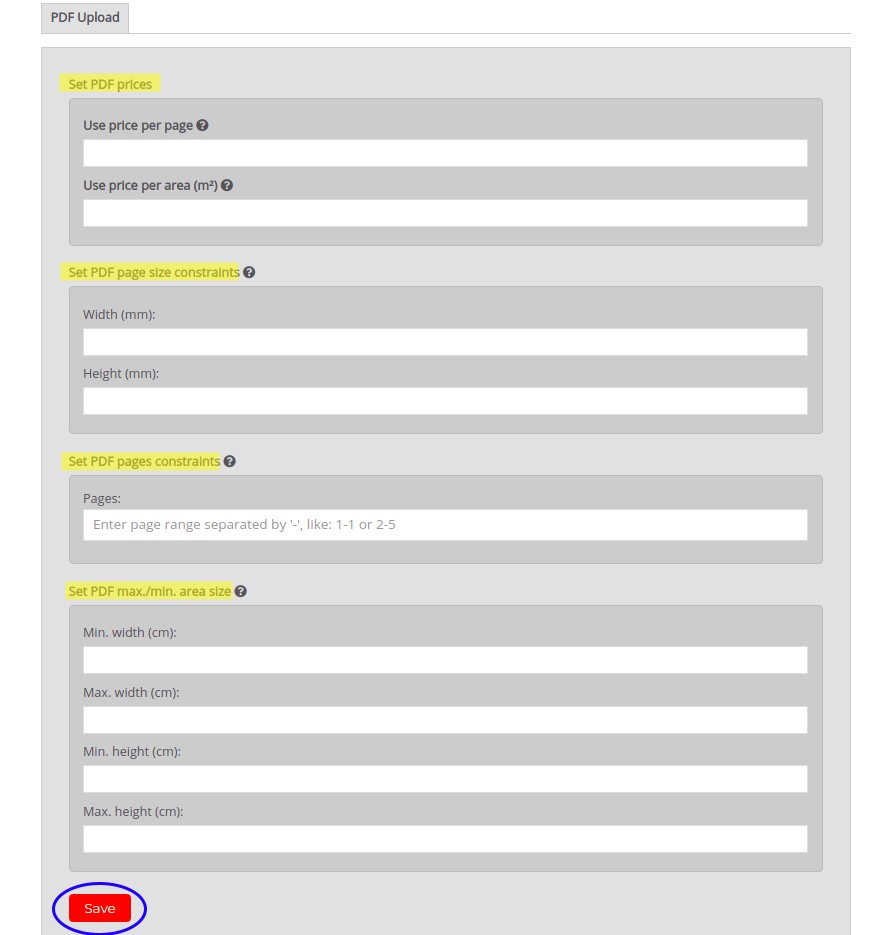
In this option you can define the requirements that the PDF file must meet so that it can be processed. Below you can see a small explanation of each section that you can configure:
- Width: in this section you must specify the exact width in millimeters that the PDF must have to be accepted.
- Height: here you must specify the exact height in millimeters that the PDF must have to be accepted.
- Pages: in this section you can enter the page range that the PDF file must have to be accepted. Example: 2-5 means the file should be 2 to 5 pages long. You have to keep in mind that if you want a specific number of pages and not use a range, you should still use this format, for example, 5-5 means that the file can only have 5 pages.
- Price per page: if you want to price your product to be calculated per page.
- Price per area: if you want to set the price of your product to be calculated by area (price determined by each square meter). If you use this option, only single page files will be accepted and the price per page option will not apply.
You can also define a maximum or minimum area to be able to accept the PDF file if you have defined a price per area, in this way your product will not accept PDFs outside the limit that you establish. Remember to press the save button for the changes to take effect:

Use rules options
The other available PDF upload option is Use rules options. By default, the PDF upload function uses the options configured in the Rules section, this means that each rule will have its own PDF uploader settings. We select Use rule options to continue:

Using rules allows you to have a different PDF uploader configuration for each combination of attributes that is possible in your product. For example, given a specific color or size, the price is one and given another color or size, the price is another.
Once you have made sure the Use rules options is set in PDF upload options, go to the Rules tab. Create a sample rule by selecting the desired attribute combination and click Add new rule.
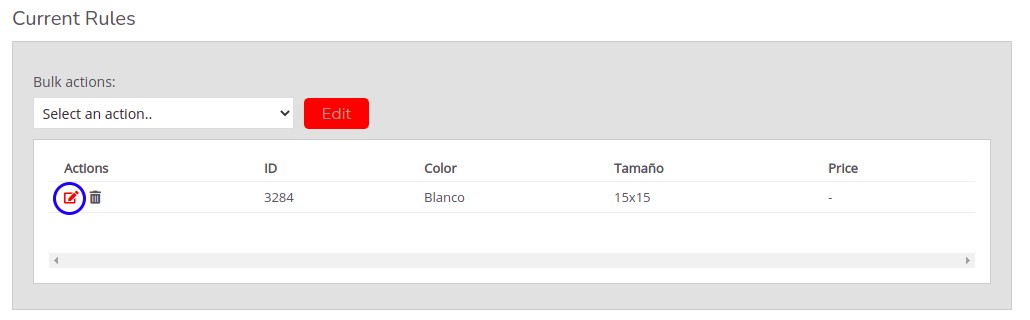
With the rule already created, you can edit it with the button highlighted in the following image or by displaying the Bulk actions menu if you want to edit multiple rules at once:
After pressing the button, a new window will open. Fill the fields with the values that you think are appropriate. Remember to press the Save button to apply the changes made:
With this action you will have defined the configuration of the PDF file loader when a specific rule is applied, in our case, when an album has a white cover and a size of 15×15.